|
Part 6 - Exposure (part 3) So let us start with what side effect do we get when we change the aperture? I am not talking about the amount of light, that is obviously more with a wider aperture, because we are pairing an aperture setting with a shutter speed to give the same exposure. You could experiment and see if you can see the difference. What should happen is that as you go to smaller apertures (larger numbers, with lengthening shutter speeds) you get a larger depth of field; more of your scene from front to back will be in focus. So surely that's simple then, we want our images as sharp as possible with the maximum depth of field we can get, so we should shoot at f/22 all the time. Well no! There is a discussion on using f/22 here, see in particular the comment by coreman. The real problem is sometimes we want a shallow depth of field, sometimes we want soft focus, not sharpness. We need control over this. More importantly, as we decrease the aperture, we have to increase the shutter time. To get our f/22 aperture we may find we have to use 1/15th of a second. We run into the side effect of shutter speed; slow shutter speeds blur motion and fast ones freeze it. So it comes down to choice, there are a range of aperture/shutter speed combinations that will give the correct exposure, and we choose an appropriate one according to the side effects, and what we are trying to achieve in the photograph. This is where skill and experience come in, and why the raw beginner should start on auto and gradually move to creative photography as their skill builds up. While we are about it we should cover the side effect of increasing the ISO setting; it improves the sensitivity (reacts faster to the light) but at the expense of noise. Noise shows up as pixels that are brighter than they should be. It is caused by electrical noise in the amplifying circuits used to bolster up the signal for higher ISOs. It shows up as lighter flecks, particularly in the shadow areas. Some cameras (actually the sensors inside) produce less noise than others. For astro-photography where high ISOs are often needed because the light is so faint, the sensors are especially cooled to reduce noise. The essence of getting exposure right is to measure what light you
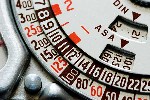
have with a light meter (or camera) and work out (or be given) an exposure
combination. If you need more light and can add it (e.g. a studio
setting) then do so, moving the lights nearer may help, before increasing the
ISO. Meters often have
A useful technique is to bracket your exposures. If you are controlling depth of field by controlling aperture, then bracket them and chose an image that gives you the required depth of field. If you are controlling motion with shutter speed then bracket them. Bracketing simply means taking extra exposures either side of what you have calculated as the optimum. Don't forget that if you have the exposure correct, then when you step one setting up a stop you have to compensate by stepping the other one down a stop. If you are in program mode this is exactly what happens when you turn the wheel, so program mode is useful for this sort of bracketting. There is another use of bracketting which you use when you are not sure of the exposure required, or where the dynamic range of the scene is large. Here you do not compensate for a change of one of the settings (aperture/shutter speed) because you do not want the exposure to remain the same. Which setting you change will depend on whether you need to keep the depth of field constant (vary shutter speed) or motion blur (vary aperture). Bracketted exposures can be used to make an HDR photo, expose for the highlighs, expose for the scene and expose for the shadows. To assist in the blending process it is helpful to use a tripod to assure the viewpoint does not change. For this sort of bracketting you will find aperture priority or shutter speed priority best and your camera may be able to do the bracketting for you (take three shots for one button press, or do the bracketting on the next three exposures - check your manual). |
[ next ]